
We have 2 iPads in my classroom and I love them for a variety of reasons. Mainly I love that my kids can have fun while working on educational apps and that the iPad seems to be a high quality reinforcer for most of my kids. But after what I discovered a few weeks ago (and I am about to share with you), I am SO MUCH MORE EXCITED about my iPads!
Ok...so I found out about this on Pinterest and then revamped it to meet my needs! Do you ever buy or make really pretty colored worksheets, only to realize that the only way your kids will see them will be in black and white? WE teachers don't have money for color copies!! So, with this app I am sharing with you today, you can download your worksheets onto your iPad (hello color!) and have the kids complete them on there! Fun, motivating, and interactive all in one.
Before beginning, I uploaded a PDF document I wanted to try out onto google drive. This app also supports dropbox as well as a few others. Today, I am using my newest science unit on Landforms (available on TPT) to show you how this great app works.
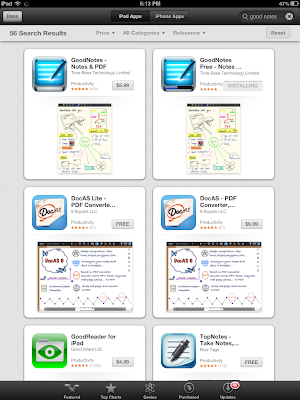
Here we go. Go to the app store and download the Good Notes app (I did the Free version).


Next, click on the + sign in the upper left corner. I clicked on Google Drive (but you could use whichever works best for you).

After doing that, I was prompted to log into my google account.

Once I logged in, all of my google drive documents showed up. I clicked on my Science Landform PDF.

A screen like this will pop up to show you your PDF is downloading.

And then, TA-DA! Here is my PDF sitting on the bookshelf!

There are a few features of this app...I'll go across the icons on the top from left to right. The first icon looks like a grid. When you click on this, you get to see an overview of all the pages in your document.

Next to that is a + sign. When you click on this, you can add photos, bookmark, or add a text box. This is probably the most useful for me (especially for those kiddos who struggle with writing!!!!!). So, when I added a text box to this comprehension sheet for our landforms science experiment, it popped up no problem, along with the keyboard. I simply typed in my answers. I used the highlighter (more on that later) to circle the correct answers as well from the multiple choices.


You can also just hold down your finger and the text option comes up. Click on that, and an instant text box will appear.

I'm skipping over the shape icon and zoom icon. To find out more about the parts of the app I did not cover, go here for a user guide. Next up, the writing utensils. You can use a pen, highlighter, or eraser.
When you hold down on the icon of the pen, a menu pops up where you can select color and thickness. I chose red to do this matching sheet.


The highlighter pretty much works the same way, just gives you a thicker line. I used that one for this tracing worksheet. The eraser icon allows you to erase any lines you drew by dragging it over them.

Next, if you move over to the icon of the 3 dots. You can hit "clear page" which erases everything you have done (so you are ready for the next student!). You can also click export/print to save the work and store it away. The "email" feature did not work for me for some reason. However, I did find a few ways to save the students work. First of all, you could just take a screen shot to save it. Then email it to yourself or a parent.

Or....you can click export current page (or all pages),

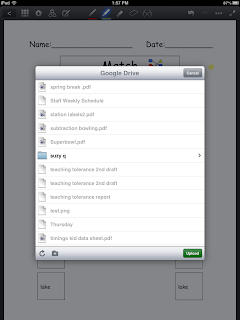
Then choose google drive (like I said earlier...the email option didn't work for me).

Next, click OK.

Then, depending on how you want to organize your documents, you can create folders or just upload the document to your drive. I created a folder (on google drive) for each student so that when this option pops up, I can find the student's folder (see Suzy Q in picture below). Next, it opens the Suzy Q folder and you simply click upload for your current document to be added to her folder.

To try all this out with my kids, I brought the iPad to summer school to have them work on it. My students had so much fun doing their "science work" on the iPad! Here is one of my students graphing using the highlighter and answering the questions with the pen functions.


And here is my student working on a matching sheet and a word search. I cannot wait to use this app all next year! Sorry for the extremely long post, but hopefully you find it helpful!


Wow! Thank you so much for this post. I am bookmarking it and trying it out soon, Heather
ReplyDeleteThis is a great tool! Thank you for sharing! :)
ReplyDeleteNatalia @ autismelements.blogspot.com
This is so cool! Thanks for sharing this :)
ReplyDeleteRae
Mindful Rambles
Wow. This is great! Thanks for sharing! I tried to use an app for a few worksheets before but it never worked very well. Can't wait to try this!
ReplyDeleteHi, this is great! I just downloaded the app and some worksheets on my ipad. What a great tool! Thanks for sharing.
ReplyDelete~Traci
The Bender Bunch
I wrote a mini grant to our PTA for an iPad and an iPod and I was told that it was granted. I haven't gotten them yet and have no clue how to use them so this step by step procedure will come in handy. Is your iPad app list still current? That will be my go-to once I get the devices. Thanks so much for all you do!!
ReplyDeleteJannike
Www.anautismconnection.blogspot.com
(One of these days I'll figure out how everyone just writes their blog name and the link goes straight to their blog, sigh, lol)
Awesome about the iPads...you will love them! I was trying to help you with your link issue (writing your blog name with a direct link), but I cannot for the life of me type in the info you need because it keeps instantly linking. Will you email me (hndeloya@gmail.com)? I think in an email I will be able to send you the exact link you need to use. Does that make sense?
DeleteThis is so awesome! I never thought of being able to do this on an iPad. I also have two in my classroom. I would like to share this on my blog. www.superteachsspecialedspot.blogspot.com
ReplyDeleteWhat a great motivator to get work done. I will go download this right now. Thanks so much!
Mary Ann
I'm glad you find this helpful! Please feel free to share on your blog!!
DeleteI can't wait to try this! What kind of laminator do you use? I'm going to look into laminating sheets you recommended on Amazon. Thanks!!
ReplyDeleteThis is my laminator...I got it through a donorschoose grant. It isn't the most amazing laminator ever, but I LOVE that it is so wide that I can laminate file folders!!
Deletehttp://www.factory-express.com/Laminators/Banner_American_Quickfinish_PL150_15_Pouch_Laminator-7487.htm
Ho do you laminate folders? 2 lsminating sheets?
DeleteI am looking into getting some tablets for my classroom. I will have 10 students, 4 classroom computers that are terrible, a CD and a tape listening center and currently borrowing a innotab 2. I am looking to get 2 cheap kid wifi ready, android based tablets through donorschoose. I know android has many apps my kids could use for free and it has some good locks on it. My district stated they do not support Ipad and they are so much more expensive but maybe after the 2 kid tablets I will try to get one. I have never used donorschoose so I need to start slow. Looking to see what others think and use.
ReplyDelete